My two-year-old has recently formed an interest in making things. She doesn’t have a long attention span, but she is enjoying learning to glue and color. So, I’ve been trying to get her involved with little projects on the weekends. I’ve also been teaching her about Halloween, in hopes she’ll understand what’s happening when the night finally rolls around.
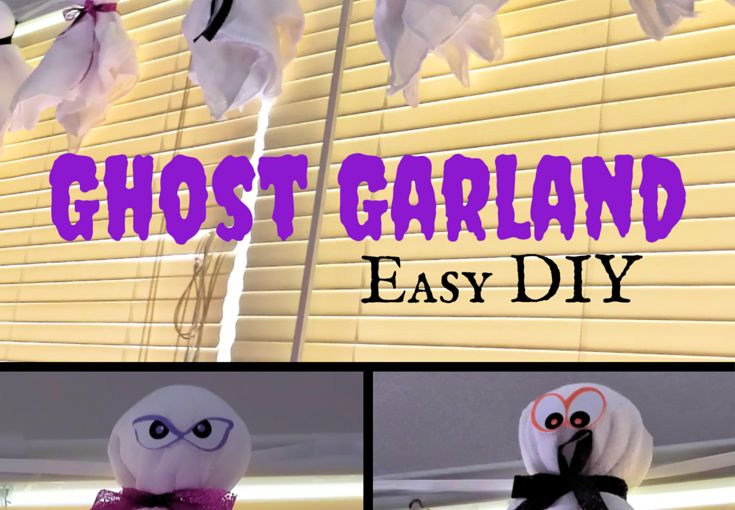
Last week, I was cleaning my daughter’s room and found some Gerber Birdseye Cloth Diapers that I never used on her. She’s potty training, so I knew there was no need to save them. They had a ghost-like look and figured this was the perfect opportunity for a Halloween craft session.
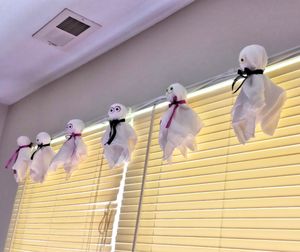
I made a quick trip to the craft store and picked up some supplies to create a garland of ghosts for over our living room windows (where little fingers can’t grab and run away with them). Below is a list of comparable supplies on Amazon:
Gerber Birdseye Cloth Diapers (10 in package)
Foam Balls (12 in package)
3/8” Black Glitter Ribbon (20 yards)
3/8” Purple Glitter Ribbon (20 yards)
Stick-on Halloween Eyes
Also…
Hot Glue Gun/Sticks
Scissors
Makes 10 Ghosts
This project is super easy to do. The diapers I had came pre-folded in quarters, so I didn’t even have to worry about folding them. I just took them out of the packaging and un-rolled them.
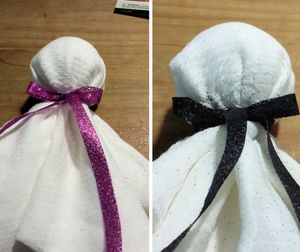
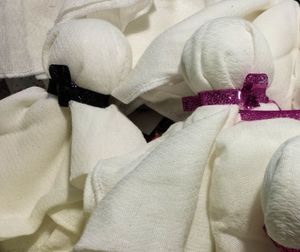
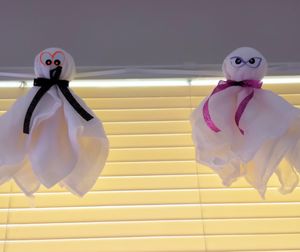
Step 1. Place a foam ball in the center of the diaper, fold and wrap the diaper over it to create a head and body. Then, tie a piece of ribbon around the neck to hold the diaper in place. I tied the ribbon with a cute little bow and left some length dangling.
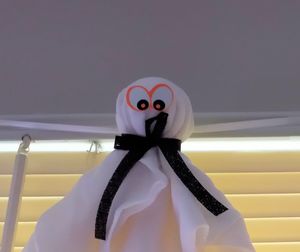
Step 2. Peel and stick on a set of foam Halloween eyes. This was the part that my daughter did and we had no problems with them staying.
Step 3. Cut a small piece of ribbon and hot glue it in a loop on the back of each ghost’s neck, so there’s a place for the long piece of garland ribbon to fit through.
Step 4. Once the glue on the loops dry and harden, run a long piece of ribbon (cut to the length you need) through each loop, so all of the ghosts are hanging together. When I did this project, I used 3 yards of each color of ribbon and had to find extra ribbon in my house for the long garland piece. You could also use tinsel garland for the long piece. You would just need to adjust the size of the loops to fit the added thickness. I actually plan on draping tinsel garland above my own ghosts once I get my Halloween decorations out of the attic.
Step 5. Hang it! This garland is a little heavy, so make sure you have some strong tape or hooks to secure it. Command Hooks are wonderful for this sort of thing.
If you like this project, please share!
